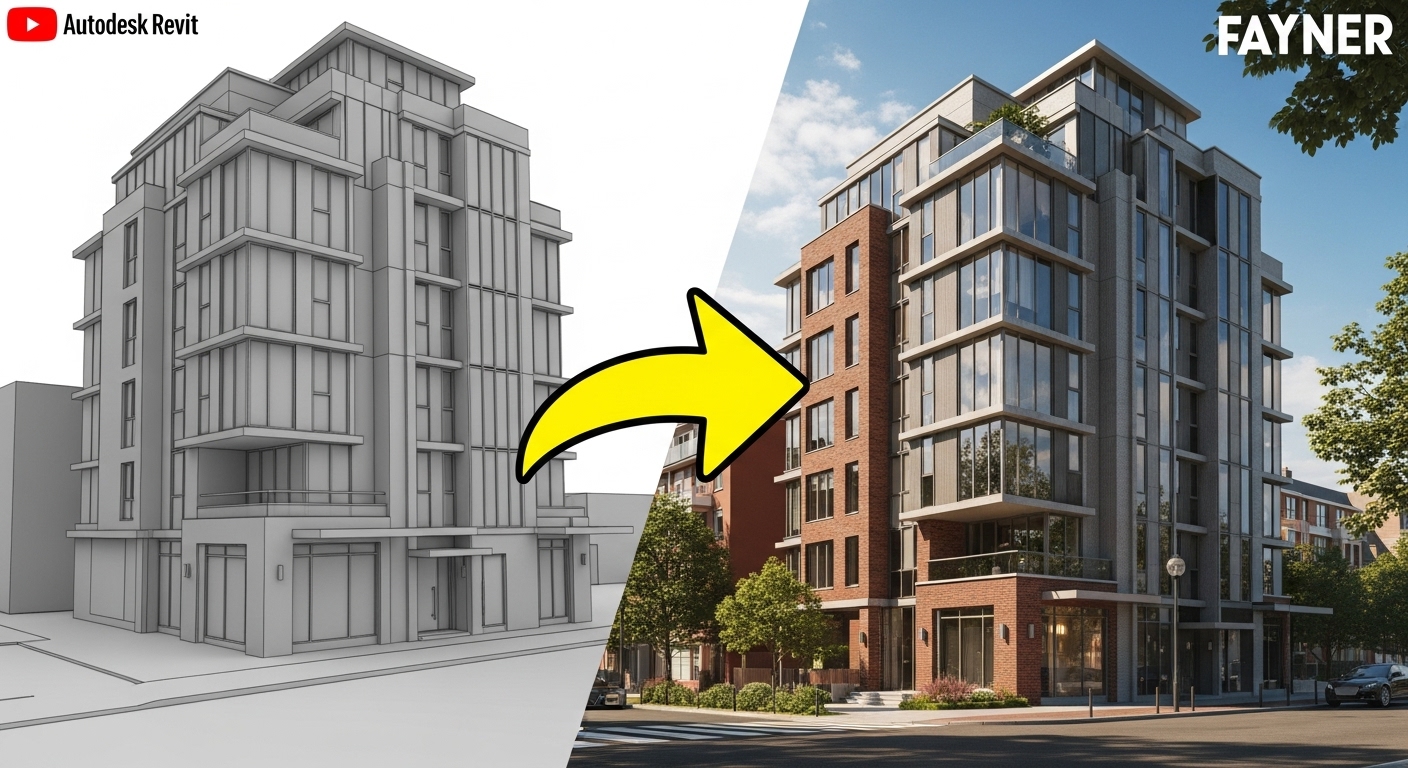
Let’s face the truth about the creative rabbit hole we often find ourselves in. After countless hours devoted to refining every detail—from the richness of oak textures to the perfect angle of the sunlight, and intricately arranging each shrub—hitting that render button frequently produces a lackluster, flat image. Despite using impeccable materials and achieving realistic lighting, an intangible quality still eludes us. The result feels more like a lifeless model than a vibrant place infused with character. Here lies the messy truth: Rendering gurus often omit a key truth: the soul of a great render isn’t found in the final click of a rendering engine. Instead, it’s forged much earlier through deliberate, often overlooked steps taken inside Revit long before ever opening Enscape or Lumion.
Compelling images aren’t created at render time; they’re revealed. The real work involves composing your geometry, choosing what to highlight, and framing a story within the scene itself. Think of the rendering software as merely a flashlight; your job is to build the sculpture worth illuminating.
Let’s move from showing a building that’s merely present to one that demands attention.
Trick #1: Model for the Shot, Not Just the Plan
Architectural training emphasizes modeling for construction documents: plans, sections, and elevations. Rendering well, however, requires modeling for the camera. This fundamental mindset shift changes everything.
Before orbiting a perspective view, invest five minutes working like a cinematographer. Gather ten reference images of architectural photography you admire. Go beyond simply looking—dissect them. Converting them to grayscale strips away color and texture, leaving behind the image’s pure skeleton: its composition.
Ask yourself:
- Where does my eye go first? Does a strong diagonal line lead it? Does it settle on a point one-third into the frame?
- How does the image achieve depth? Is a blurred element placed in the foreground? Do receding columns or trees create layers?
- What emotional impact does the lighting have? Is it harsh and dramatic, or soft and serene?
Here comes the critical Revit step: build this composition directly into your model. That sweeping curve acting as a leading line in your reference photo? In your model, avoid a static, difficult-to-edit extrusion. Instead, craft a clean, parametric form built on reference planes, allowing you to adjust its sweep and radius to guide the eye perfectly in the final shot.
For an intricate, layered façade serving as your image’s hero, avoid modeling and copying panels individually. Develop a flexible, nested family that lets you iterate on the pattern, depth, and spacing without rebuilding from scratch. Your final render’s compositional strength depends directly on the intelligence embedded in your initial model.
Trick #2: Apply the Clay Render Litmus Test
Most designers skip this humbling yet revealing step. Before applying a single material, render your view in grayscale with flat, neutral lighting.
Strip away the shiny distractions. What remains?
- A compelling composition of light, shadow, and form?
- Or a flat, confusing gray blob?
Failure of the clay test indicates a geometry problem, not a rendering problem. No quantity of 4K oak textures will save it. This is where advanced Revit skills prove essential.
Solve the issue with geometry, not filters. While depth of field in render settings can create layers, you must first model those layers.
- Foreground: Move beyond basic entourage. Model a strategic foreground element directly in Revit. Consider a deep column base, the edge of a parametric canopy, or a simple, strategically placed wall. This acts as a modeled depth cue that frames the shot, making the viewer feel in the space rather than just observing it.
- Middle Ground: This is your hero. Ensure its forms are clean and its details crisp. In clay, the difference between a simple extrusion and a complex, well-modeled profile becomes starkly apparent.
- Background: Simplify. Use massing or basic geometry to suggest context without distracting from the main event.
Even a mediocre design can achieve a cinematic quality through strong spatial layering built directly into the Revit model. Conversely, applying a stunning material to a flat, poorly composed shot will always look cheap.
Trick #3: Wield Your Camera as a Storyteller
Think of composition not as magic, but as a science with rules. Executing these rules well tests your modeling precision directly.
- The Rule of Thirds: This classic principle positions the focal point at the intersection of lines dividing the frame into thirds. In practice, this means placing your model’s most detailed, hero element—a custom staircase, a complex window assembly, a stunning fireplace—with precision. You’re not just placing a component; you’re positioning a future focal point, which requires forethought.
- Leading Lines: Use your model’s innate geometry to guide the eye. A long corridor, a roof edge, a series of columns, or even strong shadow lines should all push the viewer’s gaze toward your subject. These lines demand clean, intentional, and well-modeled edges. A jagged or poorly aligned element will break the illusion completely.
- Symmetry & Balance: Perfectly centered shots can feel powerful and serene. But they demand flawless, mirrored geometry. This is where Revit’s constraints and dimensions become your best friend. Is everything truly aligned? Are your families truly symmetric? The camera acts as a ruthless critic, exposing any and all laziness.
Master these rules before you break them. And remember, true mastery means building a model precise enough to allow for that intentional composition.
Trick #4: Sculpt with Shadow — Model Details for Light to Catch
Light serves as the protagonist of your render, with shadow playing a crucial supporting role. A common mistake involves using a bright, overhead sun that flattens everything. For drama, place your sun so roughly half the building sits in light, and half lies in shadow.
This technique, called “chiaroscuro” in art, creates instant drama and depth. However, it only works if your geometry has something to say. Shadows adore detail. They outline textures, deepen window recesses, and exaggerate your brise-soleil’s profile.
This tests your modeling fundamentals: Did you model those details authentically? Or did you attempt to fake them with a bump map? A texture might fool the eye in a flat, well-lit view, but a low-angle sun reveals the truth. A modeled reveal casts a real, hard shadow; a bump map produces only a muddy, unconvincing effect. The depth and drama you seek flow directly from the geometry you built correctly in Revit.
Trick #5: Remember — Polish Can’t Save a Forgettable Model
Prepare for the hardest pill to swallow: Post-production cannot save a lackluster idea. If your render feels flat, the issue likely isn’t your rendering settings—it’s a model lacking a “hero moment.”
Your design needs a hook—a single, unforgettable feature for the camera and viewer to latch onto. This represents the payoff for all your modeling work.
- Could it be a dramatic, parametric staircase sweeping through a double-height space?
- Maybe a complex, faceted ceiling creating a mesmerizing pattern of light and shadow?
- Or perhaps a surprising cut-through the building, framing a view to the landscape beyond?
You won’t find this hero moment in a Lumion library. It gets built in Revit. It results from pushing beyond basic walls and floors into adaptive components, complex blends, and intelligent families. Once you have this hero, then add materials and entourage to support it, not replace it. The hero element is the star; everything else is the supporting cast.
From Buttons to Mindset: The Real Secret
Forget any notion of a hidden secret. An unglamorous formula governs all: Strong Model + Strong Composition = Unforgettable Render.
The rendering engine—Enscape, Twinmotion, V-Ray—is just the final tool. It adds shine, but not soul. Soul emerges from the intentionality of your Revit work. It comes from building a model that acts not as a mere collection of elements, but as a coherent, flexible, and deeply considered design ready for its close-up.
This philosophy defines everything we teach inside RevitRealm. Our focus on parametric modeling, intelligent family creation, and “non-standard” geometry isn’t about showing off. It’s about empowerment. It’s about building a model that grants the creative freedom to tell compelling visual stories. When your geometry is both flexible and intentional, composing a stunning render stops being a struggle and becomes a joyful process of revealing what’s already there.
Fighting your software to make renders match your vision? The solution isn’t a new rendering plugin. It’s a better model.
Book a 60-minute “Render Rescue” Session with me. We’ll dive into your project, identify the one family or detail that could be your hero, and build a practical plan to model it right. We’ll move beyond the buttons and into the mindset of building for the final image.
Let’s not just make pretty pictures. Let’s build something truly worth rendering.
Share with a friend.
- AI Won’t Steal Your Job—But a Designer Using These Tools Will Have a Major Advantage
 AI won’t replace architects—but designers who master Grasshopper, Dynamo, Rhino.Inside, and generative AI will. Here’s how to gain the advantage before they do.
 - The ‘Good Enough’ Trap: How Mediocre Revit Skills Cost You FeesBasic Revit skills keep you stuck in commodity work. Learn how “good enough” habits cost architects fees, and how deeper parametric and site-responsive design wins clients.
- Adaptive Components Demystified: Revit’s Secret Weapon for Complex GeometryStruggling with complex forms in Revit? Adaptive components are the secret to intelligent panels, twisting canopies, and responsive façades. Here’s how they work.