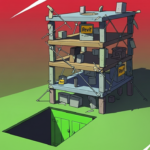
You’ve seen the legend: someone modeled a rhino in Revit. No Dynamo. No plugins. Just cunning. That’s not your Day 1 goal — but it proves a point: Revit will make organic shapes if you stop asking it for meshes and start feeding it forms it understands.
This guide is your brain reboot. We’ll think like Revit thinks, then adapt that thinking to serve design. Less “force the tool,” more “outsmart the tool.” I’ll show you how to break complex geometry into native building blocks (extrusions, sweeps, revolves) and then add or subtract with voids until it looks like the thing you actually wanted: minimal drama, maximum control.
And yes, we’ll talk about that annoying fillet-around-a-curve limitation and how to avoid it. We’ll also be honest about texture mapping — you don’t “unwrap” in Revit; you place seams with geometry. Simple. Survivable.
Part 1: The mental model (before you touch a button)
1) Revit likes four verbs
In plain language:
- Extrude: take a flat profile and push it in one direction.
- Revolve: spin a profile around an axis (bowls, domes, flutes).
- Sweep: slide one profile along a path (mouldings, rails, ribs).
- Swept Blend: slide between two profiles along a path (tapers, transitions).
If you can explain your shape as one of those verbs — or a few of them in sequence — you’re halfway home.
2) Think additive vs subtractive
“Add solids” or “carve voids.” Revit is excellent at subtracting: void extrusions, void sweeps, void revolves. Many “impossible” organic edges are just a clean solid minus a smart void.
3) Reverse the order
If additive modeling fights you, model the final envelope first and carve down; if subtractive modeling fails, build the ridges/ribs first and fill between. Reordering is often the difference between “Revit says no” and “huh, that worked.”
4) Profiles + paths are your language
Everything comes back to clean 2D sketches on sane work planes. Sloppy sketches = unstable forms. Spend the extra 30 seconds on reference planes and locked dimensions; you’ll get parametrics for free.
Part 2: When to use which form (and why)
Extrusions — the dependable brick
Use when a cross-section remains constant in a straight direction.
- Use cases: straight alcove walls, plinths, slab edges, ribs.
- Make it parametric: lock the profile to reference planes; label dimensions (width, thickness, height) as instance parameters if you want per-placement flexibility.
Revolves — anything with axial symmetry
Use when the shape repeats around a centerline.
- Use cases: domes, bowls, fluted columns, semicircular niches, torus-ish edges.
- Pro move: if your “semicircle wall” feels fussy as an extrusion, try a revolve of a rectangle (horizontal) or ellipse (vertical) around a central axis — you’ll get cleaner curvature and easier parametrics.
Sweeps — consistent section, wandering path
Use when the section is constant, but the path curves.
- Use cases: cornices, rails, curved reveals, curved jambs.
- Pro move: if your sweep refuses to cut as a fillet/void around a curved edge, your radius is too big for part of the path (more on that below). Shrink the fillet radius or adjust the geometry to ensure the path’s curvature never dips below your fillet.
Swept Blends — shape morphs as it travels
Use when you need a smooth transition between two profiles along a path.
- Use cases: tapering ribs, transitioning soffits, organic struts.
- Pro move: Stop drawing profiles in empty space. Pin every single profile sketch to a named Reference Plane. This is your foundation. It turns a fragile magic trick into a predictable, parametric tool.
Voids — the secret weapon
Use void extrusions for planar cuts, void sweeps for grooves/fillets along edges, and void revolves for scoops.
- Order matters: build the solid, then apply the void. If a void fails, simplify the path or reduce the radius.
Part 3: Curvature traps you can sidestep
The fillet-around-a-curve rule (that no one tells you)
Revit hates cutting an arched fillet void along a curved path if your fillet radius is larger than any local radius along that path. Translation: if part of your path gets tighter than your fillet, the math blows up and Revit quietly shrugs.
Fixes that work:
- Use a smaller fillet radius than the tightest point on the path, or make it a small chamfer if you can hide it with your texture.
- Change the path so its curvature never gets tighter than your desired fillet.
- Fake it: create the edge by revolving a small arc (void revolve) at the critical spot, then blend adjacent regions with shorter void sweeps. Several small successes beat one big failure.
Part 4: Texture seams (the simple, honest version)
You can’t “unwrap” textures in Revit. Period. Render textures are mapped by the shape and orientation of faces and by the material’s appearance settings (scale/rotation), not by per-face UV gizmos you drag around.
So your control comes from where you choose to make geometry, and which material you assign.
Keep it simple:
- Place seams with geometry. Break long curved runs into logical pieces (joints, keystones, panels). Revit maps per face; if you choose where faces start/stop, you choose where the seam lands.
- Rotate/scale at the material level (Appearance → image rotation/size) if a global tweak helps, but be aware that it affects every face using that material.
- Avoid the “rectangle swept along an arc” brick trap. For brick coursing around an arched opening, skew the profile (slightly angled rectangle) so the coursing follows the opening more naturally. Sometimes you must model the arch as two parts so the mapping break hides in a joint or keystone.
- Paint selectively (Split face → Paint) only when you must vary materials per face. It doesn’t fix UVs, but it can hide sins when combined with smart splits.
That’s it. No fake decals. No pretend “UV edit.” You design where the seam lives.
Part 5: Case study (the “cheats” in action)
A) The two-piece arched alcove (clean, parametric, Dynamo-free)
Goal: A semicircular alcove with vertical walls and a smooth arched head, all parametric for width, depth, spring-line, and height.
Step-by-step (additive + subtractive):
- Base walls (easy path):
- Make a semicircle (or better yet, elliptical) extrusion in plan for the straight lower walls.
- Alternative: revolve a rectangle horizontally (meaning your rotational axis is vertical) for the same effect (often cleaner joins).
- Lock profile to reference planes; label width/depth/height parameters.
- Arched head (control the curve):
- Create a sweep for the arch head: use an elliptical profile swept along an elliptical path that matches the vertical wall profile.
- Why ellipse? It gives you more “give” to match the wall curvature and avoids that brick-mapping rectangle problem.
- Parametrics:
- Width/height/depth = instance parameters for per-placement freedom.
- Wall thickness and reveal radius should be type parameters so all “Alcove-Arched-150” parts look the same.
Result: It looks “organic,” but it’s just an extrusion + a smart sweep + maybe a tiny void. Stable, editable, quick.
B) Tapered rib/canopy strut (swept blend that won’t bite)
- Sketch a gentle path (model line on a reference plane).
- Profile A (start): small rectangle with filleted corners.
- Profile B (end): stretched oval (wider + thinner).
- Swept Blend along the path. Keep profiles simple; too many edges = chaos.
- If edges look sharp, try locking the tangents between your profile segments or create the profile using the tangent end arc.
Why this works: You’re telling Revit “morph this, along here,” not “solve a freeform equation.” It can do that all day.
C) Curved cornice with rounded return (sweep + void revolve)
- Sweep a consistent moulding profile along the curved path.
- At the return, use a void revolve to scoop a rounded end that would be impossible with a single fillet.
- If the fillet refuses, reduce the scoop radius or split the path so no segment has tighter curvature than your fillet.
D) Bulged wall segment (extrusion plus subtractive shaping)
- Extrude the wall thickness as a simple block.
- Use two opposing void sweeps with shallow arcs to create a bulge.
- Keep arcs shallow; extreme curvature = failed voids. Two or three small voids often beat one dramatic one.
Part 6: A tiny progression (before you try a “rhino”)
Forget heroic animals. Start with quick wins that teach your hands how Revit thinks:
- Soap-dish “pebble”: revolve a soft profile for the bowl; cut a shallow void revolve for the depression.
- S-curve bench: two swept blends that meet in the middle; a short void sweep softens the top edge.
- Fluted column: revolve for the shaft; array a void sweep for flutes; use a separate family for the base/ capital.
- Ribbed façade panel: extrusion for the base; repeated sweeps for ribs; optional void sweeps for shadow reveals.
- Arched alcove (the one above): combine extrusion + sweep; hide texture seams at the keystone.
Each teaches one verb well. Stack verbs later.
Part 7: Make it parametric (without pain)
- Reference planes first. Name them. Lock profiles to them.
- Label the obvious—width, height, and thickness as instance parameters; profile radii as type parameters.
- Keep family geometry simple. One revolved bowl + one void revolve beats three messy blends.
- Control path length with dimensions, not by sketching freehand curves you’ll never reproduce.
- Flex early. Change the width from 1200 to 1800 right away; if it breaks, fix the constraint now, not after five more steps.
Part 8: Common “why won’t it cut?” moments (and what to do)
- Swept fillet void fails around a curve → your fillet radius is larger than a local radius along the path. Shrink it or make it a chamfer to test if it’s your profile or your path.
- Blend twists strangely → profiles aren’t aligned to the same logical axes. Add reference planes and align the profiles before blending.
- Sweep flips → profile is not locked to the path’s orientation. Use “Always vertical” (where appropriate) or add a profile Control line and lock it.
- Join/geometry order → sometimes you must join solids before a void will cut cleanly. Try joining/unjoining and reordering the operations.
Part 9: Texture sanity in one paragraph
Revit doesn’t let you push UVs around. You control mapping by where you split geometry and which faces you create. If you need brick to “flow” around an arch, don’t sweep a rectangle on an arc and pray — skew the profile (ellipse/angled rectangle) or build the head as a separate piece so the mapping seam lands in a joint or keystone, not across your pretty curve. Rotate/scale the material globally only if it helps most faces; otherwise, design the seam with geometry.
Part 10: Your “choose this verb” cheat sheet
- Extrusion → constant section, straight direction.
- Revolve → axial symmetry (bowls, domes, flutes, semicircular niches).
- Sweep → constant section along a path (cornices, rails, curved jambs).
- Swept Blend → section changes between A and B along a path (tapers, organic struts).
- Void Extrusion → planar carve (cutouts, recesses).
- Void Sweep → grooves, fillets along an edge/path (small radius, segmented if needed).
- Void Revolve → scoops, rounded ends.
If a single operation fails, split the move: two smaller voids, two shorter sweeps, or a revolve + a shave. Smaller wins, fewer headaches.
Wrap-up (and an invitation)
Revit isn’t a sculpting app, but it can create organic forms beautifully if you think in its verbs, reorder the operations, and hide seams with geometry. You’re not fighting the software anymore — you’re coaching it.
If you want to road-test this on a real shape — your alcove, a wavy canopy edge, a ribbed panel — bring the file. We’ll build it together, in native Revit, no Dynamo required. And we’ll make Revit behave, politely or otherwise.
Book a 60-minute session with Revitrealm, and let’s carve.
Share what’s useful.
- AI Won’t Steal Your Job—But a Designer Using These Tools Will Have a Major Advantage
 AI won’t replace architects—but designers who master Grasshopper, Dynamo, Rhino.Inside, and generative AI will. Here’s how to gain the advantage before they do.
 - The ‘Good Enough’ Trap: How Mediocre Revit Skills Cost You FeesBasic Revit skills keep you stuck in commodity work. Learn how “good enough” habits cost architects fees, and how deeper parametric and site-responsive design wins clients.
- Adaptive Components Demystified: Revit’s Secret Weapon for Complex GeometryStruggling with complex forms in Revit? Adaptive components are the secret to intelligent panels, twisting canopies, and responsive façades. Here’s how they work.