That moment hits every designer. You’re staring at a design for a stunning, undulating canopy or a façade with never-repeating panels. You know exactly how it should look and work. But when you open Revit, the gap between your vision and the tools feels impossible to bridge. Standard walls, roofs, and families just won’t cut it.
This is where most people hit a wall. They either dumb down the design or embark on a soul-crushing journey of manual modeling. But there’s a third path: Adaptive Components.
This isn’t a tool for programmers. It’s for designers who are tired of “no” for an answer. This guide will walk you through what these tools are, exactly how they think, and—most importantly—when to use them and when to use something else.
1. What Are Adaptive Components? (The Stretchy Fabric Analogy)
Let’s completely demystify this.
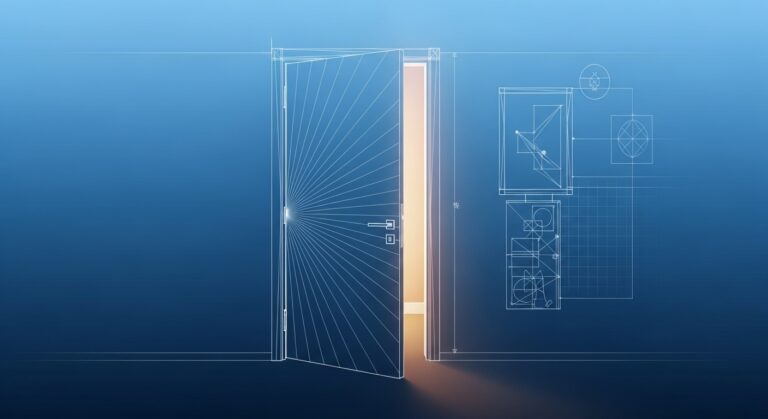
Imagine you have a standard Revit door family. You can change its width and height, but that’s it. It’s like a picture frame—rigid and fixed.
Now, imagine a piece of high-tech, stretchy fabric. You can pin this fabric to a wall with four pins. If you move one pin, the fabric stretches and bends to accommodate. The fabric doesn’t tear; it adapts.
An Adaptive Component is that stretchy fabric.
- The pins are called Adaptive Points.
- The fabric is the geometry you build (a panel, a beam, a chair).
- The wall is your project environment (a mass, a curved face, a random set of points in space).
You define the relationship between the points and the geometry in the Family Editor. Then, in your project, you tell Revit where to put the pins. The family automatically stretches, bends, and twists to fit those exact points. It’s a family that isn’t defined by fixed dimensions, but by the relative placement of its adaptive points.
2. Your Toolkit, Explained in Plain English
Before you start, let’s meet the tools you’ll be using inside the Adaptive Family Editor. Don’t let the names scare you.
- Adaptive Points: These are the anchors, the pins for your fabric. This is the most important tool. You place them first. Each point can be placed in 3D space and set to be “adaptive,” meaning it will become a placement point later. The order you set them to adaptive (1, 2, 3, 4…) is the order you’ll place them in your project.
- Reference Lines: Think of these as flexible sticks. They are much more helpful than reference planes for adaptive work because you can draw them between adaptive points at any angle. They are the perfect “bones” for building your framework. You can also set lines to be adaptive themselves, which is how you create adaptive beams or trusses.
- Reference Planes: These are your flat, stable work surfaces. Once you have points and lines creating a stable shape, you can host reference planes to them to give yourself a flat surface to draw on. For example, you’d host a plane to a reference line to define the work surface for a panel.
- Geometry (Solids & Voids): This is the “stuff” of your family—the actual 3D panel, frame, or object. You create this last, after you’ve built a stable skeleton of points, lines, and planes. You use the Create Form button to generate surfaces and solids from your framework.
3. The “When” and “Why”: A Decision Matrix
This is the most important section. Throwing an adaptive component at every problem is a mistake. Here’s how to decide.
USE Adaptive Components WHEN:
- You are cladding a complex form: This is their #1 job. You have a complex mass (from Revit or Rhino) and need to cover it with intelligent panels, frames, or louvers. Each adaptive component is a single panel that conforms to its unique spot on the mass.
- You have a repeating but unique element: A railing that follows a complex curve. Each baluster is the same adaptive family, but it subtly rotates and twists to fit its specific location on the handrail path.
- You need to place objects in 3D space freely: You have a light fixture that needs to be aimed at a specific spot in an auditorium, or a sign that must always face a viewer, no matter how it’s mounted. The adaptive points let you place it and orient it independently.
DO NOT USE Adaptive Components WHEN:
- You are designing the core organic form itself: Do not try to model an entire twisting tower as one giant adaptive component. It’s the wrong tool.
- A simple, parametric standard family will work: If you can build it with the standard Generic Model.rft template using width, height, and depth parameters, do that. It’s simpler and more stable. Use the right tool for the job.
- You need extreme, high-quality curvature: For perfectly smooth, complex curves like a car body, Revit is not the right tool. This is a job for Rhino.
4. The Rhino vs. Revit Handoff: A Best Practice Workflow
This is the strategy that separates pros from amateurs.
- Design the FORM in Rhino. Use Rhino (and Grasshopper, if you like) to design the overall, sculptural shape of your canopy, façade, or sculpture. Rhino is the master of this. Enjoy the freedom.
- Define the LOGIC in Revit. Bring that form into Revit (via Import CAD or Rhino.Inside). Now, use Adaptive Components to build the intelligent, repeating pieces that will clad that form. A single panel. A single bracket. A single louver.
- Populate the form. Use the adaptive component to panelize the surface. Your adaptive family will snap to the surface of your imported mass, creating a smart, documentable, schedulable building element out of a complex form.
You use each program for what it’s best at. Rhino for fluid design. Revit for intelligent documentation.
5. A Detailed Walkthrough: Building a Simple Adaptive Panel
Let’s make the “stretchy fabric” analogy real. We’ll build a four-point adaptive panel.
- Start Right: Open Revit. Go to File > New > Family. Navigate to and choose Generic Model Adaptive.rft. This template is pre-loaded with the necessary tools.
- Place Your Pins (Points): On the Create tab, click the Point Element tool. Click four times in the view to place four points in a rough square. Precision doesn’t matter yet.
- Make Them Adaptive: Select all four points. In the Properties palette, find the Adaptive parameter and check the box. You will now see a sequential number (1, 2, 3, 4) appear on each point. This number is the order you will place them in your project. You can change the order by selecting a point and changing its number.
- Build the Bones (Reference Lines): Go to the Create tab. Click Reference Line. Now, don’t just draw. Hover over one point, press Tab until the point highlights, click, then hover over the next point, press Tab to highlight, and click. This draws a line locked to the points. Do this for all four sides until you have a closed loop of reference lines.
- Create the Skin (Geometry): Select all four reference lines. A button will appear in the ribbon called Create Form. Click it. Revit will generate a surface stretched between the four points. You now have your stretchy fabric.
- Test It (The Magic Part): Click Load into Project and load it into a test project. Now, click the Component tool. You will be prompted to place four points. Here’s the magic: don’t place them in a rectangle. Place them in a zig-zag, or a curve, or at different heights. After placing the fourth point, watch your flat panel twist, bend, and warp to fit the exact configuration you defined.
You’ve just created a family with no fixed size or shape, only a fixed relationship between points.
6. From Simple to Smart: Adding Thickness and Parameters
That was a surface. Buildings are made of things with thickness. Let’s make it a panel.
- Back in the family, use the Model In-Place Void tool.
- Trace over your same reference lines and use Create Form to make a void extrusion.
- Use the Cut tool to create a void to cut the surface, giving it a realistic thickness.
Now you have a parametric panel that can flex to be any quadrilateral form and still have a constant, real-world thickness.
Conclusion: Empowerment, Not Complexity
Adaptive components aren’t about showing off. They’re about solving very specific, common design problems intelligently. They are the essential bridge between the dream of complex design and the reality of constructible documents.
This process of strategic modeling—knowing which tool to use and how to connect them—is a fundamental skill we focus on at RevitRealm. We move beyond abstract theory to practical, time-saving applications.
If you have a specific, complex element that you’ve been struggling to bring into Revit, book a 60-minute Power Session by sending a quick message on WhatsApp or via email. We’ll analyze your design, build the adaptive framework together, and create a reusable workflow that you can apply to future projects. Stop working against your software and start making it work for you.
Share with a collaborator.
- AI Won’t Steal Your Job—But a Designer Using These Tools Will Have a Major Advantage
 AI won’t replace architects—but designers who master Grasshopper, Dynamo, Rhino.Inside, and generative AI will. Here’s how to gain the advantage before they do.
 - The ‘Good Enough’ Trap: How Mediocre Revit Skills Cost You FeesBasic Revit skills keep you stuck in commodity work. Learn how “good enough” habits cost architects fees, and how deeper parametric and site-responsive design wins clients.