Let’s be honest. The magic of architectural design often happens in the realm of pure form and logic—a place where curves flow, patterns adapt, and buildings respond to their environment. This is the native habitat of Rhino and Grasshopper. But a design isn’t complete until it’s buildable, and that requires the structured, data-rich world of Revit.
Trying to model an undulating façade natively in Revit is like trying to write a symphony using only a metronome. You can do it, but you’ll spend all your time fighting the tool, using workarounds that are fragile and difficult to change. Conversely, trying to produce construction documents, schedules, and coordinate with engineers in Rhino is hopelessly inefficient and prone to error.
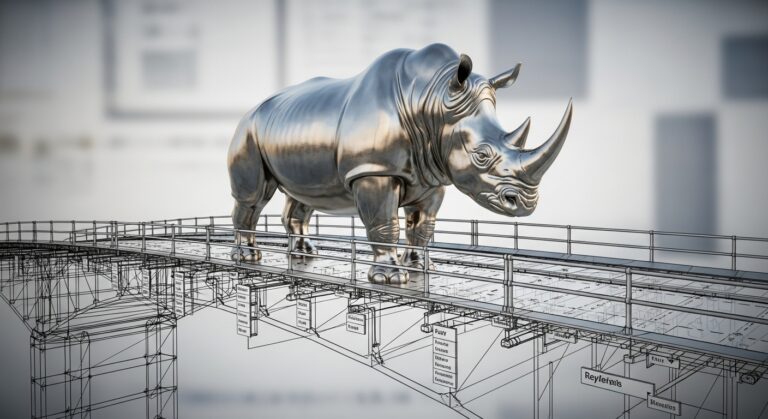
The smartest designers don’t choose one world over the other. They build a bridge between them. This article breaks down one of the most powerful workflows across that bridge: using Grasshopper to drive intelligent, native Revit elements. This is the process that turns a brilliant concept into a coordinated, constructible, and documentable building model.
Why This Workflow is Non-Negotiable for Complex Design
Many firms hit a wall. A designer creates a stunning, algorithmic form in Grasshopper, and the project grinds to a halt when it’s time to bring it into BIM. The traditional method—exporting a dumb mesh or SAT file and importing it into Revit as a DirectShape—is a dead end. That imported geometry is just a visual placeholder. You can’t schedule it, you can’t tag it, its materials often don’t behave correctly, and it bloats your model size. It’s a ghost in your BIM machine.
The workflow outlined here solves this. It allows you to clothe your complex Rhino geometry with intelligent, native Revit elements. This means every panel, every beam, every component is a first-class citizen in your model, ready for the real world of construction.
The Core Workflow, Step-by-Step: From Sculpted Form to Smart Assembly
Imagine you’ve designed a stunning, undulating wall or roof in Rhino. Its form isn’t arbitrary; it’s a hypothesis based on performance or aesthetic goals. The goal is to panelize this form with intelligent Revit families. Here’s how the conversation between the tools works:
Step 1: Model the “Why” in Rhino
Your process starts with design intent. You sculpt the overall “host” form in Rhino. This is your canvas. This could be a NURBS surface representing a complex wall, a roof, or a canopy. Its shape is driven by your response to the site, sun, or program.
Step 2: Divide and Conquer with Grasshopper
This is where you move from form to logic. In Grasshopper, you use a component like Divide Surface to overlay the Rhino surface with a grid of points (UV points). This grid defines the center point for each future Revit panel.
But static grids are boring. Grasshopper’s power is making this grid responsive. This is where you move from modeling to designing systems.
- Attractor Logic: You can write a simple algorithm that changes the density of this grid based on proximity to an invisible “attractor” point, curve, or even another surface. Panels closer to the attractor get smaller and more dense; those further away get larger. This creates gradients of scale across your form.
- Data-Driven Logic: The grid can be driven by environmental performance. You could run a solar radiation analysis on the surface in Grasshopper and use the results to drive the panel size—larger panels for areas with less sun exposure, smaller, more shaded panels for high-sun areas.
The output of this step isn’t geometry; it’s data: a list of points and a list of desired panel sizes for each of those points.
Step 3: The Magic Bridge: Rhino.Inside.Revit
This is the technology that makes the modern workflow possible. Rhino.Inside.Revit is a free plugin that allows you to run Rhino and Grasshopper inside a live Revit session. It shatters the old export-import-break-reload cycle.
With Rhino.Inside active, your Grasshopper definition isn’t an isolated script; it’s a live conduit into your BIM model.
Step 4: The Handoff: Placing and Configuring Native Revit Families
This is the critical move. Your Grasshopper script now sends two clear commands to Revit through Rhino.Inside:
- Placement: “For each point on this grid, place an instance of the Revit family Custom_Panel.rfa.” When you run the script, Revit dutifully places an instance of your custom, loadable family at every single point. These are not imported blobs of geometry; they are full-fledged, schedulable Revit elements. They appear in your Project Browser. They can be tagged and filtered.
- Configuration: Your Custom_Panel family is built parametrically with Instance Parameters for Width and Height. Back in Grasshopper, you’ve already calculated the unique size for each panel based on your attractor or performance logic.
- Grasshopper now sends the second command: “For the panel at Point A, set its Width to 1200mm and its Height to 900mm. For the panel at Point B, set its Width to 1150mm…” And so on, for every panel.
The Result: You have a complex, undulating, panelized system in Revit. Every panel is a separate, selectable, and modifiable element. You can create a schedule that lists every panel, its dimensions, its material, and its cost. You can add a parameter for “Solar Exposure” and have Grasshopper push that calculated data into the schedule as well. If the underlying Rhino surface changes, you can rerun the single Grasshopper definition, and the panels will update their positions and sizes automatically.
Why This Workflow is a Career-Defining Game Changer
- Iterative Freedom: This is the biggest benefit. You can change the attractor point’s location or the rules of your algorithm and see the entire Revit model update in near real-time. This allows for incredibly fast, data-informed design iteration based on client feedback, cost constraints, or new performance goals.
- Absolute Precision and Control: The panels are perfectly positioned and sized according to the exact logic you defined. There is no manual eyeballing or approximation, eliminating a huge source of construction errors.
- Full BIM Intelligence: You get a buildable, documentable model. The contractor can count every panel from the schedule, and the details are directly based on the intelligent families you used.
- Solves the “Bendy” Problem Elegantly: This workflow directly and elegantly solves the most common Revit pain point: integrating complex, non-rectilinear geometry into a BIM workflow without sacrificing intelligence.
Your New Design Process: A Shift in Mindset
This workflow necessitates a change in your approach. It becomes less about drawing lines and more about designing systems and writing the rules for how elements behave.
- Design Intent (Rhino): Sculpt the overall responsive form based on site, program, and environment.
- Apply Logic (Grasshopper): Define the rules for subdivision, component placement, and data management. This is where you design the system.
- Validate & Document (Revit): Let Grasshopper, via Rhino.Inside, populate your Revit model with intelligent elements. Use Revit’s unparalleled tools for analysis, coordination, and documentation to validate the design and prepare it for construction.
This isn’t just using software; it’s conducting a symphony of tools, each playing its part to perfection. Rhino is the soloist for free-form expression. Grasshopper is the composer writing the score. Revit is the entire orchestra and production team, bringing the performance to life.
The Bottom Line: It’s About Strategic Leverage
Mastering this workflow isn’t about learning to code. It’s about learning to think strategically and leverage technology to solve higher-order design problems. It’s about understanding the unique strengths of each program in your toolkit and building a process that connects them to serve your vision.
This strategic approach—orchestrating technology to serve a creative vision—is the core of what we teach at RevitRealm. We move beyond basic buttons to show you how to build bridges between abstract ideas and buildable reality.
If you have a vision for a building that responds, adapts, and performs, but aren’t sure how to bring it into the world of BIM, [book a 60-Minute Targeted Session]. We’ll take your specific design challenge and map out a practical, step-by-step workflow to make it a buildable reality. Let’s move beyond the limits of a single tool and start building what you actually imagine.
Share! Share! Share!
- AI Won’t Steal Your Job—But a Designer Using These Tools Will Have a Major Advantage
 AI won’t replace architects—but designers who master Grasshopper, Dynamo, Rhino.Inside, and generative AI will. Here’s how to gain the advantage before they do.
 - The ‘Good Enough’ Trap: How Mediocre Revit Skills Cost You FeesBasic Revit skills keep you stuck in commodity work. Learn how “good enough” habits cost architects fees, and how deeper parametric and site-responsive design wins clients.
- Adaptive Components Demystified: Revit’s Secret Weapon for Complex GeometryStruggling with complex forms in Revit? Adaptive components are the secret to intelligent panels, twisting canopies, and responsive façades. Here’s how they work.